Laporan Pratikum Job 11 PPB
LAPORAN PPB
Jobsheet 11

Dosen Pembimbing :
Djufri, S.Pd, M.Kom
Di susun oleh :
Syafri Wardian
18214046
PROGRAM STUDI D2 TEKNIK ELEKTRONIKA
AKADEMI KOMUNITAS NEGERI PADANG PARIAMAN
PDD FAKULTAS TEKNIK
2019
Database Sederhana
Langkah-langkah:
a. Buka
aplikasi android anda
b. Buat project
baru Android Aplication Project lalu isi'kan Nama Aplikasi , Nama Project
dan nama Package, dengan nama DBProject
c. Bila
sudah ok, selanjutnya- lanjutkan jobsheet yang telah di berikan dosen
pembimbing:
1. Buka
aplikasi eklips anda
2. Buat
project baru dengan nama DBProject
3. Kemudian
buka folder res => layout => main.xml. Berikut
kode lengkapnya.
<?xmlversion="1.0"encoding="utf-8"?>
<LinearLayoutxmlns:android="http://schemas.android.com/apk/res/android"
android:layout_width="fill_parent"
android:layout_height="fill_parent"
android:orientation="vertical">
<Button
android:id="@+id/NewCust"
android:layout_width="wrap_content"
android:layout_height="wrap_content"
android:text="New"/>
<Button
android:id="@+id/BrowseCust"
android:layout_width="wrap_content"
android:layout_height="wrap_content"
android:text="Browse"/>
</LinearLayout>
4. Selanjutnya
buka Kembali folder res => layout => Save_-
customer.xml. Berikut kode
lengkapnya.
<?xmlversion="1.0"encoding="utf-8"?>
<LinearLayoutxmlns:android="http://schemas.android.com/apk/res/android"
android:layout_width="match_parent"
android:layout_height="match_parent"
android:orientation="vertical">
<Button
android:id="@+id/Button01"
android:layout_width="277dp"
android:layout_height="wrap_content"
android:layout_gravity="center_horizontal"
android:text="Back
to Main Menu"/>
</LinearLayout>
5. Selanjutnya
buka Kembali folder res => layout =>
customer_from.xml. Berikut kode
lengkapnya
<?xmlversion="1.0"encoding="utf-8"?>
<LinearLayoutxmlns:android="http://schemas.android.com/apk/res/android"
android:layout_width="match_parent"
android:layout_height="match_parent"
android:orientation="vertical">
<TextView
android:id="@+id/textname"
android:layout_width="wrap_content"
android:layout_height="wrap_content"
android:text="Name"/>
<EditText
android:id="@+id/CustName"
android:layout_width="match_parent"
android:layout_height="wrap_content"
android:ems="10">
<requestFocus/>
</EditText>
<TextView
android:id="@+id/textaddr"
android:layout_width="wrap_content"
android:layout_height="wrap_content"
android:text="Address"/>
<EditText
android:id="@+id/CustAddr"
android:layout_width="match_parent"
android:layout_height="wrap_content"
android:ems="10"/>
<TextView
android:id="@+id/custGender"
android:layout_width="wrap_content"
android:layout_height="wrap_content"
android:text="Gender"/>
<RadioGroup
android:id="@+id/radioGroup"
android:layout_width="wrap_content"
android:layout_height="wrap_content"
>
<RadioButton
android:id="@+id/GMale"
android:layout_width="wrap_content"
android:layout_height="wrap_content"
android:text="Male"/>
<RadioButton
android:id="@+id/GFemale"
android:layout_width="wrap_content"
android:layout_height="wrap_content"
android:text="Female"/>
<TextView
android:id="@+id/textphone"
android:layout_width="wrap_content"
android:layout_height="wrap_content"
android:text="Phone"/>
<EditText
android:id="@+id/CustPhone"
android:layout_width="match_parent"
android:layout_height="wrap_content"
android:ems="10"/>
<Button
android:id="@+id/Save"
android:layout_width="wrap_content"
android:layout_height="wrap_content"
android:text="Save"/>
</RadioGroup>
</LinearLayout>
6. Selanjutnya
buka folder src => db.project2=>
customer_from.java Berikut
kode lengkapnya
package db.project2;
import android.app.Activity;
import android.app.AlertDialog;
import android.content.Context;
import android.content.DialogInterface;
import android.content.Intent;
import android.os.Bundle;
import android.view.View;
import android.widget.Button;
import android.widget.EditText;
import android.widget.RadioGroup;
publicclass CustomerForm extends Activity{
publicvoid onCreate(Bundle
savedInstanceState) {
super.onCreate(savedInstanceState);
setContentView(R.layout.costomer_from);
Button
btnEducation = (Button) findViewById(R.id.Save);
btnEducation.setOnClickListener(new View.OnClickListener(){
publicvoid onClick(View
arg0) {
String
custName = ((EditText) findViewById(R.id.CustName)).getText().toString().trim();
String
custAddr = ((EditText) findViewById(R.id.CustAddr)).getText().toString().trim();
String
custPhone = ((EditText) findViewById(R.id.CustPhone)).getText().toString().trim();
char custGender
= 'X';
switch(((RadioGroup)
findViewById(R.id.radioGroup)).getCheckedRadioButtonId()){
case R.id.GMale:
custGender
= 'M';
break;
case R.id.GFemale:
custGender
= 'F';
break;
}
Context
Context = CustomerForm.this;
if(custName.equals("")
|| custAddr.equals("") || custPhone.equalsIgnoreCase("") ||
custGender == 'X'){
String
E = "Please COmplete The Data";
new AlertDialog.Builder(Context)
.setTitle("Invalid
Data")
.setMessage(E)
.setNeutralButton("Close", new DialogInterface.OnClickListener()
{
publicvoid onClick(DialogInterface
arg0, int arg1) {
}
}).show();
} else {
Intent
I = new Intent( CustomerForm.this, SaveCustomer.class);
I.putExtra("CustName",
custName);
I.putExtra("CustAddr",
custAddr);
I.putExtra("CustPhone",
custPhone);
I.putExtra("CustGender",
custGender);
startActivity(I);
}
}
});
}
}
7. Selanjutnya
buka folder src => db.project2=>
DBAdapter.java Berikut kode
lengkapnya
package db.project2;
import android.content.ContentValues;
import android.content.Context;
import android.database.Cursor;
import android.database.SQLException;
import android.database.sqlite.SQLiteDatabase;
import android.database.sqlite.SQLiteOpenHelper;
import android.util.Log;
publicclass DBAdapter {
privatestaticfinal String TAG="DBAdapter";
privatestaticfinal String DATABASE_NAME="mycompany.sqlite";
privatestaticfinalintDATABASE_VERSION=1;
privatestaticfinal String TABLE_CREATE = "create
table customers (_id integer primary key autoincrement, "
+ "custname
text not null, custaddr text not null, "
+ "custgender
text not null, custphone text not null)";
privatestaticfinal String TABLE_DROP = "DROP
TABLE IF EXISTS customersl";
publicstaticfinal String KEY_ROWID="
_id";
publicstaticfinal String KEY_CUSTNAME="custname";
publicstaticfinal String KEY_CUSTADDR="custaddr";
publicstaticfinal String KEY_CUSTGENDER="custgender";
publicstaticfinal String KEY_CUSTPHONE="custphone";
privatefinal Context context;
private DatabaseHelper dbHelper;
private SQLiteDatabase db;
public DBAdapter(Context
ctx){
this.context =
ctx;
dbHelper = new DatabaseHelper(this.context);
}
privatestaticclass DatabaseHelper extends SQLiteOpenHelper
{
DatabaseHelper
(Context ctx){
super(ctx, DATABASE_NAME, null, DATABASE_VERSION);
}
@Override
publicvoid onCreate
(SQLiteDatabase db){
db.execSQL(TABLE_CREATE);
}
@Override
publicvoid onUpgrade(SQLiteDatabase
db, int oldVersion, int newVersion){
Log.w(TAG, "Upgrading
database from version " + oldVersion + " to " + newVersion
+ ",
which will destroy all old data");
db.execSQL(TABLE_DROP);
onCreate(db);
}
}
public DBAdapter
open() throws SQLException {
db = dbHelper.getWritableDatabase();
returnthis;
}
publicvoid close(){
dbHelper.close();
}
publiclong insertCustomer(String
custName, String custAddr, char custGender,String custPhone){
ContentValues
initialValues= new ContentValues();
initialValues.put(KEY_CUSTNAME,
custName);
initialValues.put(KEY_CUSTADDR,
custAddr);
initialValues.put(KEY_CUSTGENDER,
Character.toString(custGender));
initialValues.put(KEY_CUSTPHONE,
custPhone);
returndb.insert("customers",null,
initialValues);
}
public Cursor
getAllCustomers(){
returndb.query("customers", new String[]
{
KEY_ROWID, KEY_CUSTNAME, KEY_CUSTADDR, KEY_CUSTGENDER, KEY_CUSTPHONE
}, null, null, null, null, KEY_ROWID + "
DESC");
}
}
8. Selanjutnya
buka folder src => db.project2 =>
SaveCustomer.java
Berikut kode lengkapnya
package db.project2;
import android.app.Activity;
import android.os.Bundle;
import android.content.Intent;
import android.view.View;
import android.widget.Button;
import android.widget.Toast;
publicclass SaveCustomer extends Activity
{
@Override
publicvoid onCreate(Bundle
savedInstanceState) {
super.onCreate(savedInstanceState);
setContentView(R.layout.save_customer);
//get the
inputed data
Intent
i = getIntent();
Bundle
b = i.getExtras();
String
custName = b.getString("CustName");
String
custAddr = b.getString("CustAddr");
String
custPhone = b.getString("CustPhone");
char custGender =
b.getChar("CustGender");
DBAdapter
DB = new DBAdapter(this);
try{
DB.open();
DB.insertCustomer(custName,
custAddr, custGender, custPhone);
Toast
.makeText(this, "Data
Successfully Saved", Toast.LENGTH_SHORT)
.show();
}
catch (Exception Ex){
Toast
.makeText(this, "Saving
Error !!!", Toast.LENGTH_SHORT)
.show();
finally{
DB.close();
}
Button
btnBack = (Button) findViewById(R.id.Button01);
btnBack.setOnClickListener(new View.OnClickListener()
{
publicvoid onClick(View
arg0) {
Intent
i = new Intent(SaveCustomer.this, DBAdapter.class);
startActivity(i);
}
});
}
}
10. Selanjutnya
buka folder src => db.project2=>
Dbproject2Activity.java
Berikut kode lengkapnya :
package db.project2;
import android.app.Activity;
import android.os.Bundle;
import android.content.Intent;
import android.database.Cursor;
import android.view.View;
import android.widget.Button;
import android.widget.Toast;
publicclass Dbprojec2Activity extends Activity
{
/** Called
when the activity is first created. */
@Override
publicvoid onCreate(Bundle savedInstanceState)
{
super.onCreate(savedInstanceState);
setContentView(R.layout.main);
Button
btnNew = (Button) findViewById(R.id.NewCust);
btnNew.setOnClickListener(new View.OnClickListener()
{
publicvoid onClick(View
v) {
Intent
Aww = new Intent(DbProjecRikaActivity.this,
CustomerForm.class);
startActivity(Aww);
}
});
Button
btnBrowse = (Button) findViewById(R.id.BrowseCust);
btnBrowse.setOnClickListener(new View.OnClickListener()
{
publicvoid onClick(View
v) {
DBAdapter
DB = new DBAdapter(DbProjecRikaActivity.this);
DB.open();
Cursor
C = DB.getAllCustomers();
if(C.moveToFirst()){
do{
Toast.makeText(DbProjecRikaActivity.this,
C.getString(1) + ", " + C.getString(2) + ",
" + C.getString(3) + ", " + C.getString(4),
Toast.LENGTH_SHORT).show();
} while (C.moveToNext());
}
else
Toast.makeText(DbProjecRikaActivity.this, "No
data", Toast.LENGTH_SHORT).show();
DB.close();
}
});
}
}
11. Selanjutnya
buka folder res => values => AndroidManifes.xml
Berikut kode
lengkapnya :
<?xmlversion="1.0"encoding="utf-8"?>
<manifestxmlns:android="http://schemas.android.com/apk/res/android"
package="db.project.rika"
android:versionCode="1"
android:versionName="1.0">
<uses-sdkandroid:minSdkVersion="8"/>
<application
android:icon="@drawable/ic_launcher"
android:label="@string/app_name">
<activity
android:name=".Dbprojec2Activity"
android:label="@string/app_name">
<intent-filter>
<actionandroid:name="android.intent.action.MAIN"/>
<categoryandroid:name="android.intent.category.LAUNCHER"/>
</intent-filter>
</activity>
<activityandroid:name=".CustomerForm"android:label="Customer
Data"></activity>
<activityandroid:name=".SaveCustomer"android:label="Save
Data"></activity>
</application>
<Uses-sdkandroid:minSdkVersion="7"/>
</manifest>
Selanjutnya menampilkan hasil running
dari project yang telah anda buat..DAN INI HASILNYA...
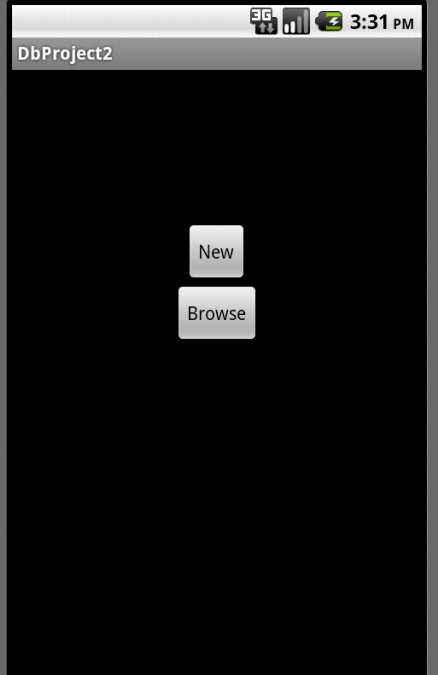
untuk memasukkan data ke dalam database silahkan klik buton New
kemudian anda dapat mengisi data anda:


silahan klik tombol button save:

kemudian hsilnya dapat di lihat pada halaman bawah browser:


Komentar